Player UI
Player UI는 화면에 배치합니다.
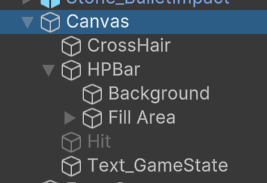

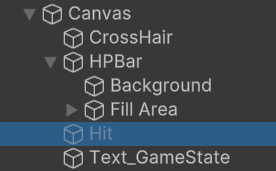
Ray()의 타겟이 되는 CrossHair


Player의 체력을 나타내는 Slide


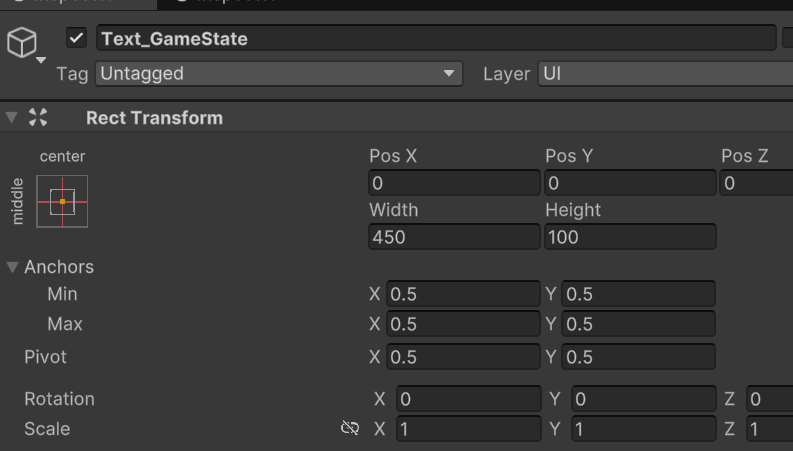
게임의 상태를 나태낼 Text가 필요합니다.
하이라키에 빈오브젝트를 만들고 이름을 GameManager라고 합니다.
같은 이름의 스크립트를 만들고 public Sstatic GameManager gm; 싱글톤으로 지정하면 다른 스크립트에서 이용할수 있습니다.
using System.Collections;
using UnityEngine;
using UnityEngine.UI;

public class GameManager : MonoBehaviour
{
    public static GameManager gm;
    public GameObject gameLabel;
    Text gameText;

    PlayerMove player;
    private void Awake()
    {
        if(gm == null)
        {
            gm = this;
        }
    }
    public enum GameState
    {
        Ready, Run, GameOver
    }
    public GameState gState;
    // Start is called once before the first execution of Update after the MonoBehaviour is created
    void Start()
    {
        gState = GameState.Ready;
        gameText = gameLabel.GetComponent<Text>();
        gameText.text = "Ready...";
        gameText.color = new Color32(255,185,0,255);
        StartCoroutine(ReadyToStart());
        player = GameObject.Find("Player").GetComponent<PlayerMove>();
    }
    IEnumerator ReadyToStart()
    {
        for(float i = 5.0f; i > 0; i -= 0.1000000000f)
        {
            gameText.text = i.ToString("N1");
            yield return new WaitForSeconds(0.1f);
        }

        yield return new WaitForSeconds(0.1f);
        gameText.text = "Go";
        yield return new WaitForSeconds(0.5f);
        gameLabel.SetActive(false);
        gState = GameState.Run;
        print("Run");
    }

    // Update is called once per frame
    void Update()
    {
        if(player.hp <= 0)
        {
            gameLabel.SetActive(true);
            gameText.text = "Game Over";
            gameText.color = Color.red;
            gState = GameState.GameOver;
        }
    }
}
UI를 하나더 만들어 Enemy의 자식으로 만듭니다.
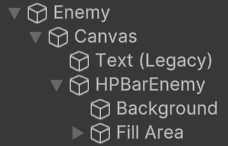

이 캔버스는 월드좌표로 처리해야 하므로 Render Mode를 World로 하고

스케일이 너무 크므로 0.01로 줄여야 합니다.

UI.를 처리하기 위해서는
using UnityEngine.UI를 맨위에 선언해야 합니다.
slider를 처리하기 위해서는 변수를 선언하고 끌어다 놓고
public Slider hpSlider;
hpSlider.value = (float)hp / (float)maxHp;
Text를 처리하기 위해서는 텍스트를 선언하고 끌어다 연결해주고
public Text statusText;
statusText.text = m_State.ToString() + hp;
GameManager에서 게임 상황을 표시하는 Text는 게임진행중에는 꺼야 하므로
public GameObject gameLabel; 게임오브젝트 변수를 선언 끌어다 놓고
gameText = gameLabel.GetComponent<Text>();
gameText.text = "Ready...";
SetActive를 설정해서 안보이게 합니다.
gameLabel.SetActive(false);
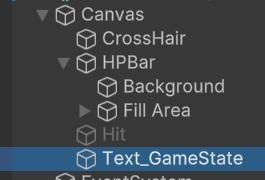
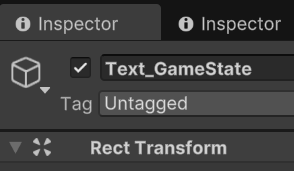
Text_GameState를 끌어다 놓고 Inspector의 체크를 Off로 시작하고 스크립트에서 처리합니다.
Enemy의 UI는 축이 고정되어 있어 Enemy의 Forward방향을 카메라 방향과 맞춰주면 항상 정면에서 볼수 있게 billboard라는 스크립트를 작성하고 추가해줍니다.
using UnityEngine;

public class Billboard : MonoBehaviour
{
    public Transform cam;
    // Start is called once before the first execution of Update after the MonoBehaviour is created
    void Start()
    {

    }
    private void LateUpdate()
    {
        //transform.LookAt(transform.position + cam.forward);
        transform.forward = cam.forward;
    }
    // Update is called once per frame
}
Canvas에 추가해 줍니다. Camera의 방향에 맞춰야 하므로 Camera를 연결해 줍니다.


적한테 공격당하면 화면이 빨갛게 변하도록 해보겠습니다.
Cavas에 Image를 추가하고 Hit으로 이름변경 색상을 빨간색에 반투명하게 알파를 조정하고 Inspector에서 언체크 해줍니다.


피격은 PlayerMove 스크립트에서 처리합니다 Hit을 연결해줍니다.
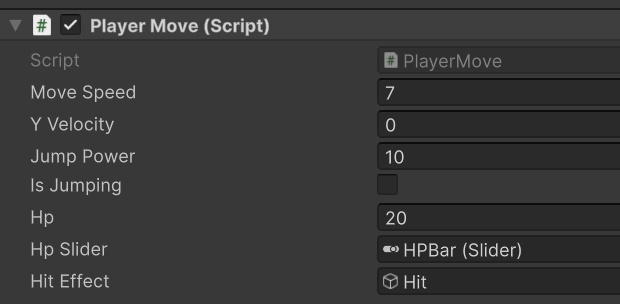
공격당하면 Coroutine()을 이용 SetActive를 켰다 꺼서 깜박이게 해줍니다.
public GameObject hitEffect;

  public void DamageAction(int damage)
    {
        hp -= damage;
        if (hp > 0) {
            StartCoroutine(PlayHitEffect());
        }
    }
    IEnumerator PlayHitEffect()
    {
        hitEffect.SetActive(true);
        yield return new WaitForSeconds(.3f);
        hitEffect.SetActive(false);
    }
경기 시작전 Ready Start를 Text를 GameManger에서 표시하고
    void Start()
    {
        gState = GameState.Ready;
        gameText = gameLabel.GetComponent<Text>();
        gameText.text = "Ready...";
        gameText.color = new Color32(255,185,0,255);
        StartCoroutine(ReadyToStart());
        player = GameObject.Find("Player").GetComponent<PlayerMove>();
    }
    IEnumerator ReadyToStart()
    {
        for(float i = 5.0f; i > 0; i -= 0.1000000000f)
        {
            gameText.text = i.ToString("N1");
            yield return new WaitForSeconds(0.1f);
        }

        yield return new WaitForSeconds(0.1f);
        gameText.text = "Go";
        yield return new WaitForSeconds(0.5f);
        gameLabel.SetActive(false);
        gState = GameState.Run;
        print("Run");
    }
PlayerMove 스크립트에서 GameState가 Run 상태가 아니라면 키보드 입력을 Update()못하게 처리합니다.
    void Update()
    {
        if(GameManager.gm.gState != GameManager.GameState.Run)
        {
            return;
        }
Player의 체력이 0이 되어 죽었을 경우 GameOver로 상태를 변환하고 표시합니다.
이건 GameManager 스크립트에서 실시간으로 감시하면서 처리합니다
    void Update()
    {
        if(player.hp <= 0)
        {
            gameLabel.SetActive(true);
            gameText.text = "Game Over";
            gameText.color = Color.red;
            gState = GameState.GameOver;
        }
}'인생유니티 > FPS게임' 카테고리의 다른 글
| Enemy Animation (0) | 2025.04.22 |
|---|---|
| 모델링 교체와 애니메이션 - 알파 (1) | 2025.04.22 |
| Enemy 제작 (0) | 2025.04.22 |
| FPS Game 제작 - 프로토 - 무기 제작 (0) | 2025.04.21 |
| FPS Game 제작 - 프로토 - 플레이어 제작 (1) | 2025.04.21 |