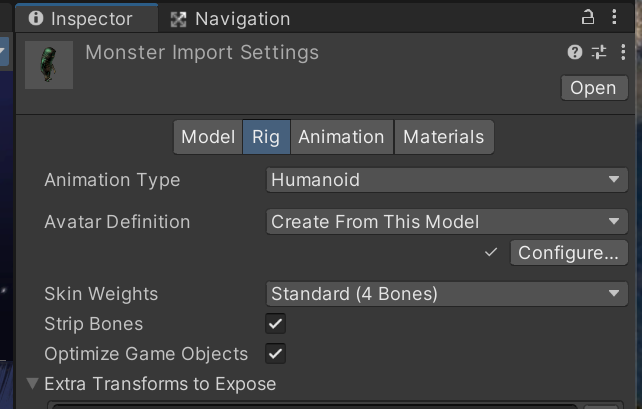
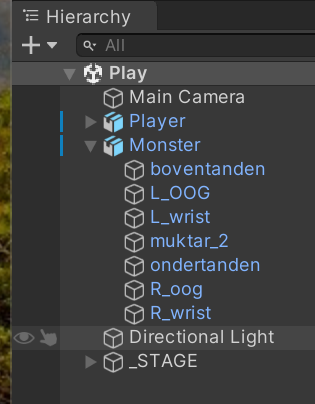
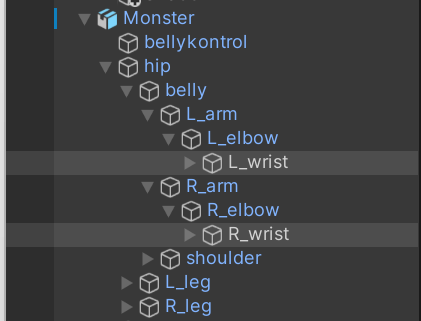
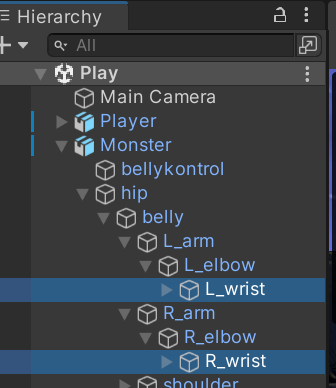
보통의 인체형 모델은 애미메이션을 수행하기 위해 Rig(본 구조, 뼈대)가 설정돼 있다.적 캐릭터 모델도 이러한 관절이 설정돼 있으며 하리라키 뷰에서 확인할 수 있다. 하이라키 뷰상에 표시된 각 관절은 게임오브젝트이며 모드 Transform 컴포넌트를 가지고 있다. 이렇게 하나의 3D모델안의 많은 Transform연산은 로드가 높으므로 최적화가 필요하다. 필요한것만 두고 다른것들은 노출되지 않게 하면 속도 향상에 도움을 줄 수 있다.

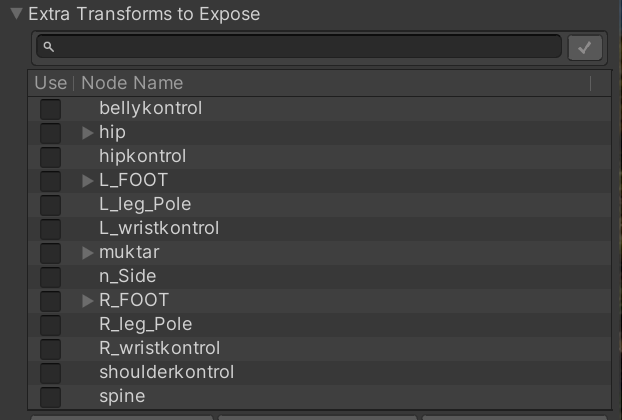
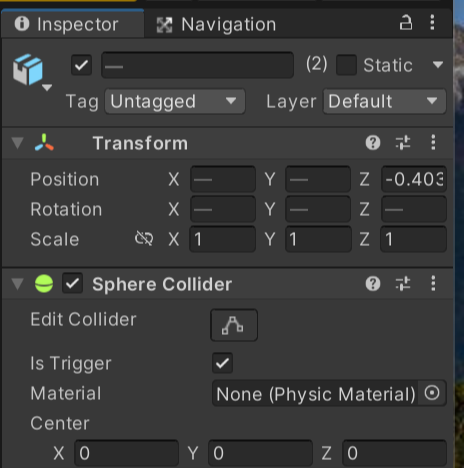
몬스터 모델에서 필요한 Rig는 Sphere Collider와 Rigidbody를 추가한 양손이므로 이부분만을 하이라키 뷰에 노출되게 설정해보자. 05.Models/Monster폴더에 있는 Monster원본 모델을 선택후 인스펙터뷰 Rig  탭의 Optimize Game Objects 옵션을 선택하면 하단에 Extra Transforms to Exppose 항목이 나타난다.

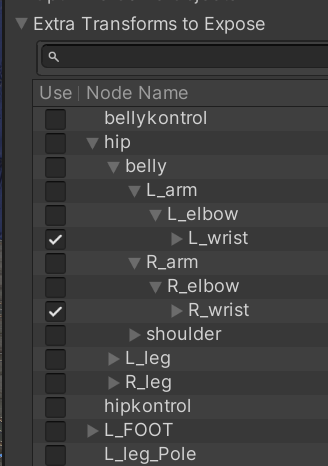
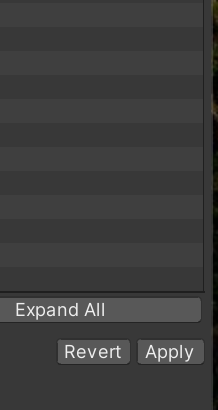
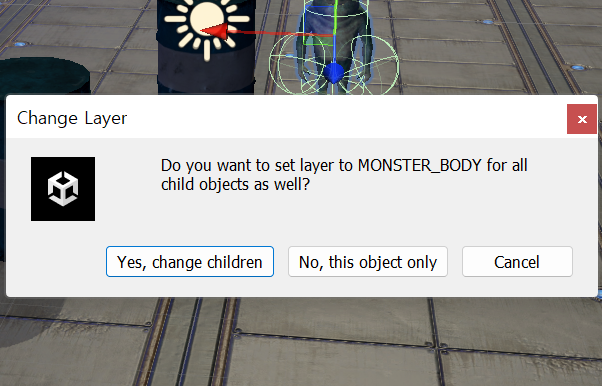
 L_wrist와 R_wrist만 선택하고 Apply를 누르면 하이라키뷰의 Monster가 정리된걸 볼 수 있다.

)

본 구조 최적화는 프리팹으로 만들기 전에 해야한다. 하이라키뷰의 Monster는 아직 프리팹으로 만들기 전이므로 원본 Monster모델을 선택하고 본 구조를 최적화 할 수 있었다. 

몬스터 본체의 Capsule Collider와 양손의 Sphere Collider는 걸을때 마다 충돌을 일으킨다. 이를 막기위해 레이어로 분리한다.

인스펙터뷰의 레이어를 누르고 +를 눌러 MONSTER_BODY, MONSTER_PUNCH라는 2개의 레이어를 추가한다.

우선 하이라키뷰의 Monster를 눌러  MONSTER_BODY로 레이어를 선택하면 

하위 하이라키도 바꿀꺼냐고 물어보면 No를 대답한다. L_wrist와 R_Wrist를 눌러 MONSTER_PUNCH로 레이어를 바꾼다.


메뉴>Edit>ProjectSetting>Phsics 맨 아래 Layer Collision Matrix 설정에서  MONSTER_BODY와 MONSTER_PUNCH가 XY로 교차하는 부분의 체크박스를 언체크하면 두 레이어간의 물리적인 충돌은 물리엔진에서 처리하지 않는다.

몬스터가 플레이어와 일정 거리 이내로 좁혀지면 공격 애니메이션을 수행한다. 이때 플레이어의 생명력이 줄어드는 코드를 짜보자.

방법은 collider를 통해 처리하는 방법과 주기적으로 데미지를 주는 방법이 있다. 몬스터는 공격 상태가 되면 양손으로 타격하는 애니메이션을 실행하므로 전자의 방식으로 구현해보자.

하이라키뷰에서 L_wrist, R_wrist를 선택한후 다음 속성을 변경하면 동시에 적용된다.

물리적 충격을 주가위해 몬스터의 양속에 Collider와  Rigidbody컴포넌트를 추가한다. 

몬스터본체 Capsule Collider와의 간섭을 없애기 위해 Collider의 Is Trigger check, 움직임은 애니메이션에서 컨트롤 하므로 물리엔진인 Rigidbody의 Is Kinematic check한다.

Tag에서 PUNCH를 만들고 다시 L_wrist, R_wrist를 선택한후 TAG를 PUNCH로 바꿔준다.

주인공 Player에도 Capsule Collider를 추가해 다음과 같이 Center (0,1,0), Height:2을 설정한다. 

Rigidbody를 추가하고 FreezeRotation x,z를 check한다. 이러면 넘어지지 않는다

보통 FPS나 TPS게임을 개발할때 주인공은 character Controller컴포넌트를 사용한다. collider+rigidbody에 물리엔진을 disable해서 떨림현상이나 미림현상을 방지할 수 있다


OnTriggerEnter 콜백 함수

몬스터 양손에 Sphere Collider에서 IsTrigger를 체크했기때문에 OnTrigger계열의 콜백함수가 호출된다.


PlayerCtrl에 OnTriggerEnter()를 추가한다.

using System;
using System.Collections;
using System.Collections.Generic;
using UnityEngine;

public class PlayerCtrl : MonoBehaviour {
    // Start is called before the first frame update
    

    Transform tr;
    private Animation anim;

    private float moveSpeed = 10f; //이동속도
    private float turnSpeed = 0f;  //회전속도

    private readonly float initHP = 100.0f;  //초기 생명값
    public float curHP; //현재생명값

    IEnumerator  Start() {  //start()함수는 코루틴으로 실행할 수 있다.
        curHP = initHP;
        tr = GetComponent<Transform>();
        anim = GetComponent<Animation>();  //추가된 코드
        anim.Play("Idle");
        turnSpeed = 0.0f;  //프로그램 기동시 가비지 마우스값을 막기위해
        yield return new WaitForSeconds(0.3f);  //0.3초 기다린후
        turnSpeed = 100f;  //변수값을 설정
    }

    // Update is called once per frame
    void Update() {
        float h = Input.GetAxis("Horizontal");  //AD 입력 좌우
        float v = Input.GetAxis("Vertical");  //WS 입력 전후
        if (Mathf.Abs(h) > float.Epsilon || Mathf.Abs(v) > float.Epsilon) {  //움직임이 없다면 불필요한 동작을 안한다.
            Vector3 dir = Vector3.right * h + Vector3.forward * v;
            tr.Translate(dir.normalized * moveSpeed * Time.deltaTime);
            PlayerAnim(h, v);
        }
        float r = Input.GetAxis("Mouse X");  //마우스 x축 입력 
        tr.Rotate(Vector3.up * turnSpeed * Time.deltaTime * r);
    }
    void PlayerAnim(float h, float v) {
        GetComponent<NavCtrl>().SetNavStop();
        if (v >= 0.1f) {  //앞으로 달림
            anim.CrossFade("RunF",0.25f);
        } else if(v <= -0.1f) { //뒤로 움직임
            anim.CrossFade("RunB", 0.25f);
        } else if(h >= 0.1f) { //오른쪽으로 움직임
            anim.CrossFade("RunR", 0.25f);
        } else if (h <= -0.1f) { //왼쪽으로 움직임
            anim.CrossFade("RunL", 0.25f);
        } else { //제자리대기
            anim.CrossFade("Idle", 0.25f);
        }
    }
    void OnTriggerEnter(Collider coll) {
        if(curHP >= 0.0f && coll.CompareTag("PUNCH")) {
            curHP -= 10.0f;
            Debug.Log($"Player hp = { curHP / initHP }");
            if (curHP <= 0.0f) {
                PlayerDie();
            }
        }
    }
    void PlayerDie() {
        Debug.Log("Player Die !");
    }
}

실행하다보니 플레이어를 마우스로 좌우로 회전 컨트롤 하는게 잘 안된다. 

처음에는 마우스로 우클릭을 하면 그 지점을 바라보는 걸 할려고 했다.

물론 스크린좌표를 월드좌표로 변환해서 레이를 쏴서 그 오브젝트를 바라보게해도 되는데 간단하게 LookAt()을 이용해보겠다.

스크립트를 하나 만들고  RightClick으로 이름 짓는다. 스크립트를 Player에 적용한다.

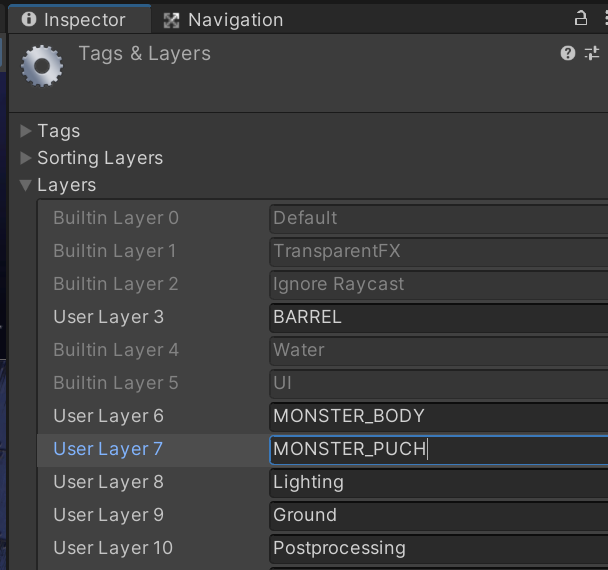
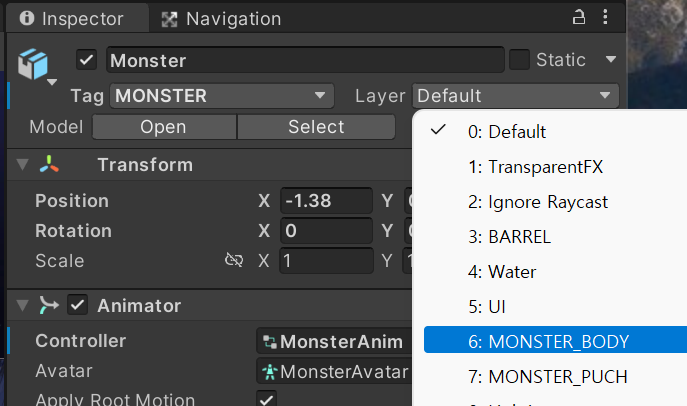
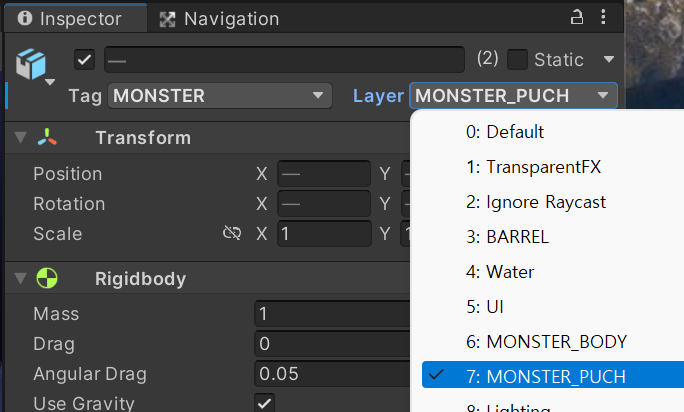
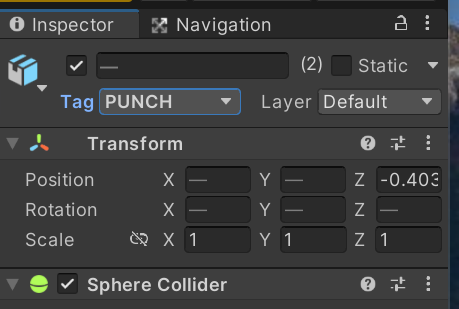
Monster 인스펙터  TAG가 MONSTER로 되어 있어야 한다.

FindwidhtTag()로 간단히 찾아 monsterTR에 저장하고 LookAt()을 이용해 방향을 바꾼다. 

다만. 순간적으로 바꿔지기 때문에 부드럽게 바꾸려면 다른 함수를 써야 한다. 

using System.Collections;
using System.Collections.Generic;
using UnityEngine;

public class RightClick : MonoBehaviour
{
    // Start is called before the first frame update
    private Transform monsterTr;  //컴포넌트의 캐시를 처리할 변수
    void Start()
    {
        monsterTr = GameObject.FindWithTag("MONSTER").GetComponent<Transform>();
    }

    // Update is called once per frame
    void Update()
    {
        if (Input.GetMouseButtonDown(1)) {
            transform.LookAt(monsterTr);
        }
    }
}

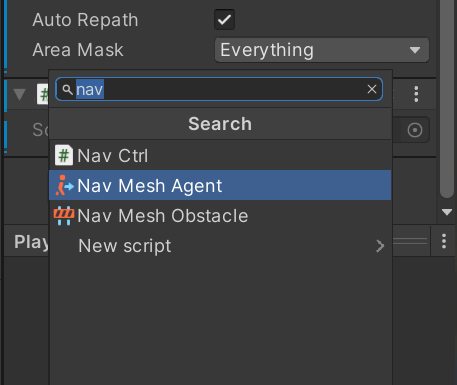
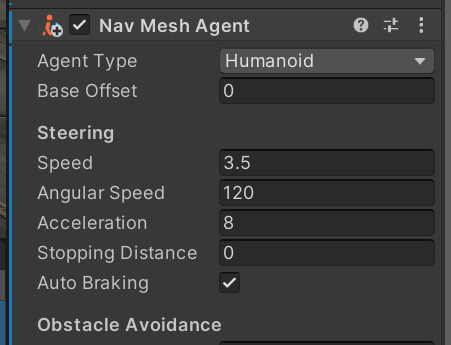
다른 방법은  어차피 NavMesh가 적에 적용되어 있으니 그걸 응용해보기로 했다. 목적은 자동추적보다는 플레이어의 자동 회전에 가깝다. 일단 하이리키 Player에 NavMesh Agent를 추가한다.

교재의 프로젝트에 영향을 주지 않게 하기 위해 따로 스크립트도 추가하고 NavCtrl로 이름짓는다.

코드는 간단하다. 마우스 우클릭을 하면 Player가 자동으로 적을 따라가고 다시 우클릭을 하면 멈춘다.

다른 스크립트에도 Navigation을 멈추게 하기 위해  SetNavStop()을 추가한다.

    public void SetNavStop() {
        agent.isStopped = true;
    }

추가된 NavCtrl 전체코드, 대부분 MonsterCtrl에서 NavMesh에 관련된 코드를 복붙했다.

using System.Collections;
using System.Collections.Generic;
using UnityEngine;
using UnityEngine.AI;  //for Navigation
public class NavCtrl : MonoBehaviour
{
    // Start is called before the first frame update
    private NavMeshAgent agent;
    private Transform monsterTr;  //컴포넌트의 캐시를 처리할 변수

    void Start()
    {
        agent = GetComponent<NavMeshAgent>();
        agent.isStopped = true; //추적을 중지
        monsterTr = GameObject.FindWithTag("MONSTER").GetComponent<Transform>();
    }

    // Update is called once per frame
    void Update()
    {
        if (Input.GetMouseButtonDown(1)) {
            if (agent.isStopped == true) {
                agent.SetDestination(monsterTr.position);  //목표설정
                agent.isStopped = false; //추적을 개시
            } else {
                agent.isStopped = true; //추적을 중지
            }
        }
    }
    public void SetNavStop() {
        agent.isStopped = true;
    }
}

WASD키를 눌렀을때 Navigation을 멈추기 위해 다음 코드를 PlayerCtrl스크립트 PlayerAnim()  맨윗에 추가한다.

 GetComponent<NavCtrl>().SetNavStop();로 NavCtrl의 SetNavStop에 접근할 수 있다. 스크립트 이름이 class이름이고 이걸 GetComponet<T>의 인수로 바로 사용할 수 있다.

void PlayerAnim(float h, float v) {
        GetComponent<NavCtrl>().SetNavStop();

좌클릭을 하면 총이 나갈때도 네비게이션을 멈추게 해야하는데 다행이 멈춘다 . 이유는 각자 찾아보세요. ㅎㅎ 아마 애니메이터의 State가 변하면서 뭔가 바뀌는듯.

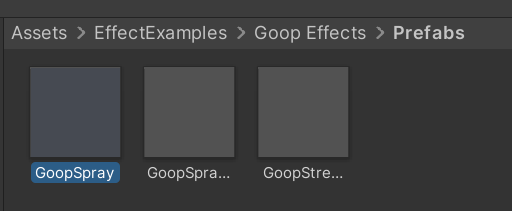
주인공 캐릭터(Player)가 쏜 총알이 몬스터에 명중하면 몬스터가 피를 흘리는 혈흔 효과(Blood Effect)를 추가해보자. 혈은 효과는 파티클로 구현하며 프로젝트뷰의 03.Prefabs/EffecExamples/Blood/Prefabs폴더에 있는 BloodSprayeffect를 사용한다.  버전의 차이인지 발견하지 못해서 아래 EffectExamples > Goop Effects > Prefabs> GoopSpray를 사용하였다.

Resources 폴더

지금까지는 프리팹을 사용하기 위해 public GameObject xxx를 선언하고 인스펙터에서 연결해놓고 사용하였다. 이번에는 스크립트에서 런모드(동적)으로 로드하는 방법을 사용한다. 이방법을 쓰기 위해서는 프리팹이나 에셋이 Resouces 폴더안에 있어야 한다. 

 Assets root에 Resources 폴더를 하나 만들자. BloodSprayeffect나 GoopSpray를 끌어다 놓는다. 이 Resources폴더는 빌드할때 포함되므로 필요한 것들만 놓기 바랍니다.

MonsterCtrl 스크립트에 다음과 같이 추가한다.  Goopspray효과는 피튀는게 좀 작아서 localScale을 변경해 크게했다

  • blood.transform.localScale = new Vector3(5, 5, 5);  //효과가 작아서 확대했다.

효과의 인스턴스를 만드는데 인수가 4개이다 마지막 monsterTr의 Child로 만들겠다는 뜻이다.

  • GameObject blood = Instantiate<GameObject>(bloodEffect, pos, rot, monsterTr);

이렇게 child로 만들면 Monster가 총알을 맞은뒤 이동해도 혈흔이  따라다닌다.

private GameObject bloodEffect;
void Start(){
	bloodEffect = Resources.Load<GameObject>("GoopSpray");
}
private void OnCollisionEnter(Collision coll) {
    if (coll.collider.CompareTag("BULLET")) {
        Destroy(coll.gameObject);             //충돌한 총알을 삭제
        anim.SetTrigger(hashHit);  //피격 리액셔  애니메이션 실행
        Vector3 pos = coll.GetContact(0).point;
        Quaternion rot = Quaternion.LookRotation(-coll.GetContact(0).normal);
        ShowBloodEffect(pos, rot);  
    }
}
void ShowBloodEffect(Vector3 pos, Quaternion rot) {
    GameObject blood = Instantiate<GameObject>(bloodEffect, pos, rot, monsterTr);
    blood.transform.localScale = new Vector3(5, 5, 5);  //효과가 작아서 확대했다.
    Destroy(blood, 1.0f);
}

MonsterCtrl 전체코드

using System.Collections;
using System.Collections.Generic;
using Unity.VisualScripting;
using UnityEngine;
using UnityEngine.AI;  //for Navigation


public class MonsterCtrl : MonoBehaviour
{
    //몬스트 상태 
    public enum State {  //인스펙터뷰에 콤보박스로 표시됨
        IDLE, PATROL, TRACE, ATTACK, DIE ,DANCE
    }

    public State state = State.IDLE;  //몬스트 현재상태
    public float traceDist = 10.0f;  //추적 사정거리
    public float attackDist = 2.0f; //공격 사정거리
    public bool isDie = false;  //몬스터사망여부

    private Transform monsterTr;  //컴포넌트의 캐시를 처리할 변수
    private Transform playerTr;  
    private NavMeshAgent agent;
    private Animator anim;

    public readonly int hashTrace = Animator.StringToHash("IsTrace");
    public readonly int hashAttack = Animator.StringToHash("IsAttack");
    private readonly int hashHit = Animator.StringToHash("Hit");

    private GameObject bloodEffect;

    void Start()
    {
        monsterTr= GetComponent<Transform>();
        playerTr = GameObject.FindWithTag("PLAYER").GetComponent<Transform>();  
        agent = GetComponent<NavMeshAgent>();
        anim = GetComponent<Animator>();
        bloodEffect = Resources.Load<GameObject>("GoopSpray");
        StartCoroutine(CheckMonsterState());
        StartCoroutine(MonsterAction());
        
    }

    //일정한 간격으로 몬스터의 행동 상태를 체크
    IEnumerator CheckMonsterState() {
        while(!isDie) {
            yield return new WaitForSeconds(0.3f);
            //Player와 Monster간의 거리측정 스칼라값
            float distance = Vector3.Distance(playerTr.position, monsterTr.position);
            if(distance <= attackDist) {
                state = State.ATTACK; //Attack로 상태변경
            } else if(distance <= traceDist) {
                state = State.TRACE;  //Trace로 상태변경
            } else {
                state = State.IDLE;  //Idle로 상태변경
            }
        }
    }
    //몬스터의 상태에 따라 몬스터의 동작을 수행
    IEnumerator MonsterAction() {
        while (!isDie) {
            switch(state) {
                case State.IDLE:
                    agent.isStopped= true; //추적을 중지
                    anim.SetBool(hashTrace, false);
                    break;
                case State.TRACE:
                    agent.SetDestination(playerTr.position);  //목표설정
                    agent.isStopped = false; //추적을 재개
                    anim.SetBool(hashTrace, true);
                    anim.SetBool(hashAttack, false); //공격파라메터 변경
                    break;
                case State.ATTACK: //공격상태
                    anim.SetBool(hashAttack, true);  //공격파라메터 변경
                    break;
                case State.DIE: //사망상태
                    break;

            }
            yield return new WaitForSeconds(0.3f);
        }
    }
    private void OnCollisionEnter(Collision coll) {
        if (coll.collider.CompareTag("BULLET")) {
            Destroy(coll.gameObject);             //충돌한 총알을 삭제
            anim.SetTrigger(hashHit);  //피격 리액셔  애니메이션 실행
            Vector3 pos = coll.GetContact(0).point;
            Quaternion rot = Quaternion.LookRotation(-coll.GetContact(0).normal);
            ShowBloodEffect(pos, rot);  
        }
    }
    void ShowBloodEffect(Vector3 pos, Quaternion rot) {
        GameObject blood = Instantiate<GameObject>(bloodEffect, pos, rot, monsterTr);
        blood.transform.localScale = new Vector3(5, 5, 5);  //효과가 작아서 확대했다.
        Destroy(blood, 1.0f);
    }
    private void OnDrawGizmos() {  //상태에 따라 기즈모 색깔 변경
        if(state == State.TRACE) {

            Gizmos.color = Color.blue;
            Gizmos.DrawWireSphere(transform.position, traceDist);
        }
        if(state == State.ATTACK) {
            Gizmos.color = Color.red;
            Gizmos.DrawWireSphere(transform.position, attackDist);
        }
    }
}

+ Recent posts